Mobile Photography Tips for Beginners
In 2025, your smartphone is more powerful than ever. With cutting-edge cameras, AI-powered editing, and advanced features, mobile photography has become one of the most accessible and popular forms of photography worldwide. Whether you’re starting a personal blog, building your Instagram, or simply capturing memories, you can take stunning photos using nothing but your phone.
In this beginner’s guide, we’ll explore essential mobile photography tips to help you shoot like a pro, without any fancy gear. These tips are beginner-friendly but effective enough to level up your photography instantly.
✅ Why Learn Mobile Photography?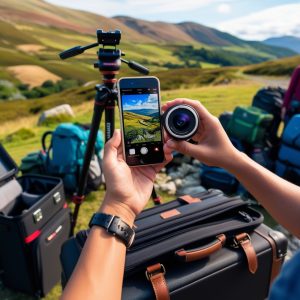
Mobile Photography Tips
Before we dive into the tips, here’s why mobile photography matters:
-
You already have your camera with you — your smartphone.
-
Mobile cameras in 2025 offer high megapixels, multiple lenses (ultrawide, telephoto), and AI enhancements.
-
You can instantly edit and share your photos.
-
It’s cost-effective — no expensive equipment required.
Now, let’s get to the tips!
1. 🧼 Clean Your Lens
This may sound too simple, but it’s a crucial first step. Your phone lives in your pocket, bag, or hand — meaning the lens often collects fingerprints, dust, or oil. A dirty lens results in blurry or foggy images.
Tip: Use a soft microfiber cloth or your shirt (gently!) to clean the lens before you shoot.
2. 🎯 Tap to Focus and Adjust Exposure
Most smartphones allow you to tap the screen to set the focus point. When you tap, the camera focuses on that area and adjusts the brightness.
-
Tap your subject to ensure it’s in sharp focus.
-
After tapping, slide up or down (on most phones) to adjust exposure manually.
This gives you better control over your shot instead of letting the camera guess.
3. 🌅 Use Natural Light +
Mobile Photography Tips
Lighting is everything in photography.
-
Avoid flash whenever possible — it can make images look harsh or unnatural.
-
Instead, use natural light: shoot near a window, during golden hour (1 hour after sunrise or before sunset), or in shaded areas outdoors.
-
Avoid direct harsh sunlight — it can cause overexposure or unwanted shadows.
Pro Tip: Use the sun as a backlight for dreamy portraits.
4. 🧭 Use the Rule of Thirds
mobile photography tips
The Rule of Thirds is a fundamental photography composition principle.
-
Imagine your frame is divided into a 3×3 grid.
-
Place your subject along the lines or at the intersections (called “power points”).
This makes your photo more balanced and visually interesting.
How to enable it: Go to your camera settings and turn on the grid feature.
5. 🧍 Keep It Steady
Blurry photos are often caused by shaky hands.
How to avoid it:
-
Hold your phone with both hands and tuck in your elbows.
-
Rest your arms on a stable surface or lean against something.
-
Use a tripod or phone stand for extra stability — they’re affordable and portable.
In low light, a steady shot is even more important!
6. 🔍 Explore Different Angles
Don’t just shoot from eye level. Explore unique and creative perspectives:
-
Low angle: Place your phone near the ground to make subjects look larger or dramatic.
-
High angle: Shoot from above for flat-lays, food shots, or group photos.
-
Tilted angle (Dutch tilt): For creative compositions.
Try moving around your subject to find the best angle — this is how photographers get those standout shots.
7. 🌄 Use Leading Lines
Use Leading Lines is Mobile Photography Tips
Leading lines guide the viewer’s eye through your photo. Roads, fences, buildings, or shadows can act as natural lines.
-
Use them to direct focus toward your subject.
-
They also add depth and structure to your image.
This is a great way to make everyday scenes look artistic.
8. 🛠️ Don’t Rely on Zoom
Avoid using digital zoom — it reduces image quality and makes your photo grainy.
Instead:
-
Physically move closer to your subject if possible.
-
Or take the photo without zoom and crop it later in editing.
Some smartphones in 2025 offer telephoto lenses (optical zoom) — that’s fine to use, but stay away from digital zoom unless absolutely necessary.
9. 🖼️ Pay Attention to the Background
A cluttered or distracting background can ruin a great photo.
-
Look around your subject — remove unwanted objects if possible.
-
Use portrait mode or depth effect to blur the background (bokeh effect).
-
For clean shots, use plain walls, sky, or nature as backgrounds.
A simple background helps your subject stand out clearly.
10. 🎨 Edit Your Photos (But Don’t Overdo It)
Editing enhances your photos — it brings out color, sharpness, contrast, and mood.
Popular editing apps in 2025:
-
Snapseed (free, powerful)
-
Lightroom Mobile
-
VSCO
-
CapCut Photo Editor
-
Canva (for social posts)
Editing tips:
-
Increase brightness and contrast slightly.
-
Adjust shadows and highlights.
-
Sharpen the image and enhance saturation (gently).
-
Use filters wisely — don’t make it look fake.
11. 📸 Try Different Camera Modes
Try Different Camera Modes is Mobile Photography Tips
Modern smartphones offer several built-in modes:
-
Portrait mode – For professional-looking headshots.
-
Night mode – For low-light or nighttime photography.
-
Panorama – For wide landscapes.
-
Macro – For super close-up shots (flowers, insects, textures).
Explore these features and get creative with your shots!
12. 💡 Use Accessories (Optional)
While you don’t need them, accessories can level up your mobile photography:
-
Mini tripods – for stability
-
Clip-on lenses – wide-angle, macro, or fisheye
-
Ring lights – for better lighting in portraits
-
Bluetooth shutter remotes – for hands-free shooting
These are inexpensive and beginner-friendly.
13. 📂 Shoot in HDR or RAW (If Available)
-
HDR (High Dynamic Range) helps balance light in challenging scenes.
-
RAW format (available in many 2025 smartphones) captures uncompressed data, giving you more flexibility when editing.
Enable these features in your camera settings to get the best results in difficult lighting.
14. 🧪 Practice and Experiment
The best way to improve your mobile photography is to practice regularly.
-
Try different lighting, subjects, locations, and times of day.
-
Take lots of photos — experiment with settings and apps.
-
Study your favorite photographers or Instagram creators and learn from their styles.
🏁 Final Thoughts
Final Thoughts is Mobile Photography Tips
You don’t need an expensive camera or years of training to take amazing photos — just a smartphone, some creativity, and the right techniques.
In 2025, mobile photography is more powerful than ever. Start with the basics, keep experimenting, and most importantly — have fun!
📲 Ready to turn your phone into a creative tool? Try these tips today and share your best shots online!
🔍 Suggested Keywords (For SEO)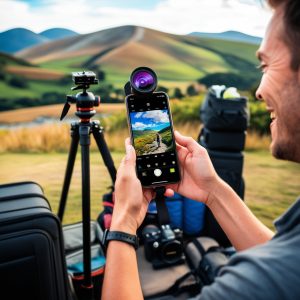
-
mobile photography tips 2025
-
smartphone photography for beginners
-
best camera phone tips
-
how to take better photos with your phone
-
mobile photography guide
-
mobile camera hacks
-
phone photography tricks